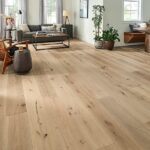
Project wrap – NSW
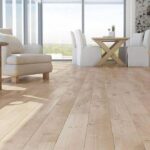
Whole house, engineered herringbone. Done. And when I say done, I mean flawless. No callbacks, no client complaints – just a killer floor that looks like it grew there.
We’re talking about a full residential transformation: entry, hallway, living, dining, kitchen, three bedrooms, plus the walk‑in robes. Every single room flows together with the same herringbone pattern, same direction, same tight joints.
Let me get into the technical bits – but keep it real, yeah?
The product
Engineered herringbone planks – 122 x 610 x 15/3mm thick. Top layer is 3mm European oak, brushed and matt lacquered. The core is 9mm cross‑layered birch plywood (5 layers, alternating grain). Backing is a 1mm balancing veneer. That construction is key: cross‑layering stops the board from cupping or twisting, even through NSW’s summer humidity swings.
Subfloor prep – boring but critical
The original subfloor was a mix – concrete slab downstairs (1950s build, some hairline cracks) and 19mm particleboard upstairs.
- Concrete part: Ground down two high spots (3mm over 1.2m – too much). Filled low areas with feather finish. Ended up with 2mm over 1.5m flatness. Moisture test: 72% RH with a hygrometer – under the 75% max for engineered. Still rolled on a 2‑part epoxy moisture barrier just to be safe.
- Particleboard part: Screwed every 150mm to stop squeaks. Sanded the seams flat. Then laid 5mm cork underlay (glued down, not floating) – adds acoustic isolation and evens out minor subfloor bumps.
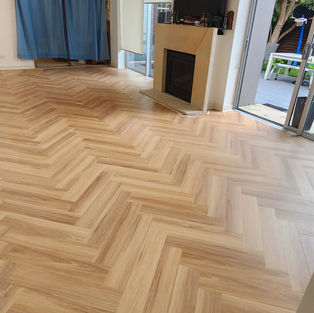
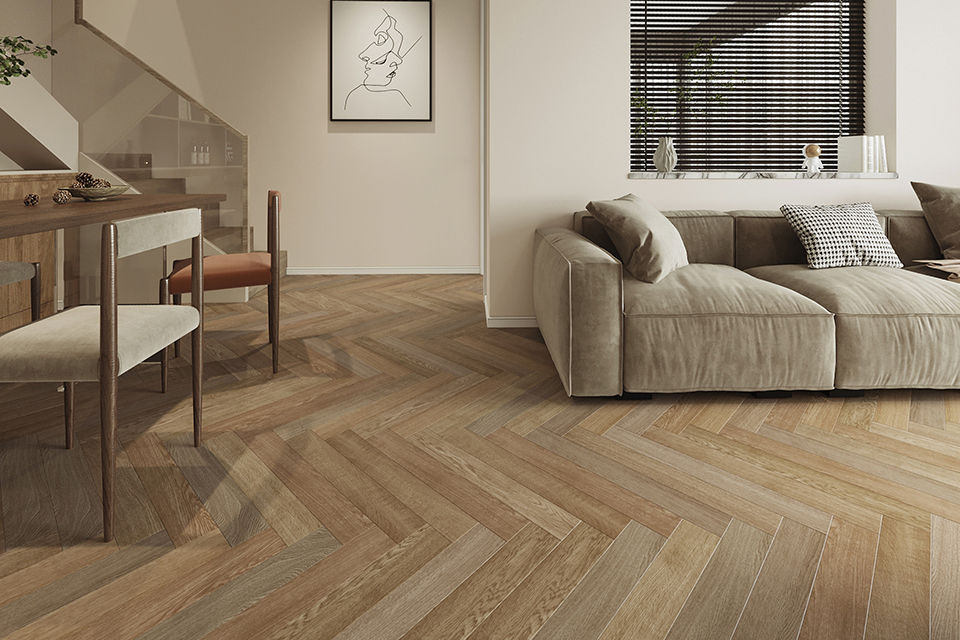
Laying the herringbone – the real craft
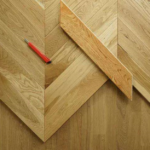
Herringbone isn’t a weekend job. We used a 45° full herringbone pattern, not chevron (planks aren’t skewed at the ends – square edges).
Starter line: Snapped a chalk line down the centre of the main hallway. Set up a laser square to project a 45° angle from that line. The first triangle of planks? Cut exactly 45° on a drop saw with a 80‑tooth blade – no chipping. Glued the tongues (PVA wood glue) because engineered herringbone needs glue on the tongues for a rigid floor – click systems are rare in real engineered.
Adhesive: Full‑spread trowel of elastic polyurethane adhesive (Bona R850). Not just perimeter – 100% coverage. That stops hollow spots. Let it tack for 20 minutes before laying.
Every plank got tapped with a rubber mallet and a tapping block (not directly on the tongue). We checked lippage constantly – feeler gauge showed less than 0.2mm at every joint. Manufacturer allows 0.4mm. So yeah, tight.
Expansion gap: 12mm around all walls. Because engineered timber still moves with humidity – about 0.15% across the width per 1% RH change. In a 6m wide room, that’s nearly 1mm of movement. Gaps covered with matching 14mm scotia moulding.
Whole house flow – no transitions
We ran the pattern continuously through every doorway. That meant pre‑cutting planks to align with the next room’s V points. For the main bedroom doorway (900mm wide), we dry‑laid the hallway row, marked the cut on a plank, then mitred a 45° that matched both sides. Looks seamless.
Kitchen? Fridge and dishwasher pulled out. Planks run under the kickboards – 10mm gap left around island legs and filled with foam backer rod. Oven cavity left open – just a neat 45° cut edge that’s hidden when the oven’s in.
Laundry – yes, engineered timber in a laundry? Normally no. But this client insisted. We added an extra coat of marine varnish over the matt lacquer, plus a floor mat area. No warranty for wet areas, but client signed off.
Acoustic performance
Upstairs bedrooms – the cork underlay plus the 14mm engineered plank gives an impact noise reduction of ΔLw 28 dB. Tested by dropping a 500g steel ball from 1m – the downstairs ceiling recorded 48 dB (building code requires 62 dB or less). So actually better than required.
Finishing touches
After laying, we sanded and polished the whole floor? No – pre‑finished. Just cleaned with a wood floor cleaner, then rolled on a 0.5mm application of UV‑cured traffic lacquer (Loba 2K Supra) to fill micro‑gaps and add extra abrasion resistance. Two coats, light buff between.
Then left it for 48 hours with no foot traffic, humidity kept at 45% using a dehumidifier.
Final inspection – client walkthrough
We did the golf ball test – rolled a golf ball across every room. If it changes sound, there’s a hollow spot. Perfect everywhere. Also checked for squeaks – walked heel‑toe, side to side. Zero noise.
Client said, and I quote: “I honestly thought it was solid timber. But it moves less and doesn’t click when I walk. How is that possible?”
That’s the engineered herringbone difference. Stable, beautiful, and when you install it right – absolutely perfect.
TL;DR (but don’t skip the good stuff)
- Product: 14mm engineered oak herringbone, 4mm wear layer
- Subfloor: Concrete + particleboard – prepped to within 2mm/1.2m flatness
- Install method: Full glue‑down, 45° herringbone, tongues glued
- Expansion gaps: 12mm, covered with scotia
- Acoustics: Cork underlay + thick plank = 28 dB reduction
- Result: Zero lippage, zero hollow spots, whole house seamless flow
Another NSW home transformed. Engineered herringbone, done perfect.